You've provided a clear and detailed guide for using the BeautyPro Symmetry App International — an excellent tool for microblading and micropigmentation artists aiming to achieve precise, symmetrical eyebrow designs. Here’s a refined and professional version of your instructions, optimized for clarity, flow, and usability (ideal for tutorials, user manuals, or onboarding content):
✨ BeautyPro Symmetry App International – Step-by-Step Guide
The Ultimate Tool for Perfect Eyebrow Symmetry in Microblading & Micropigmentation
Designed with precision and ease in mind, the BeautyPro Symmetry App helps you achieve flawless symmetry every time — from brow mapping to final design.
Follow these simple 7 steps to get accurate results:
Step 1: Launch the App
- Open your device and tap the “BeautyPro Symmetry App International” icon.
- Wait for the app to load and display the camera interface.
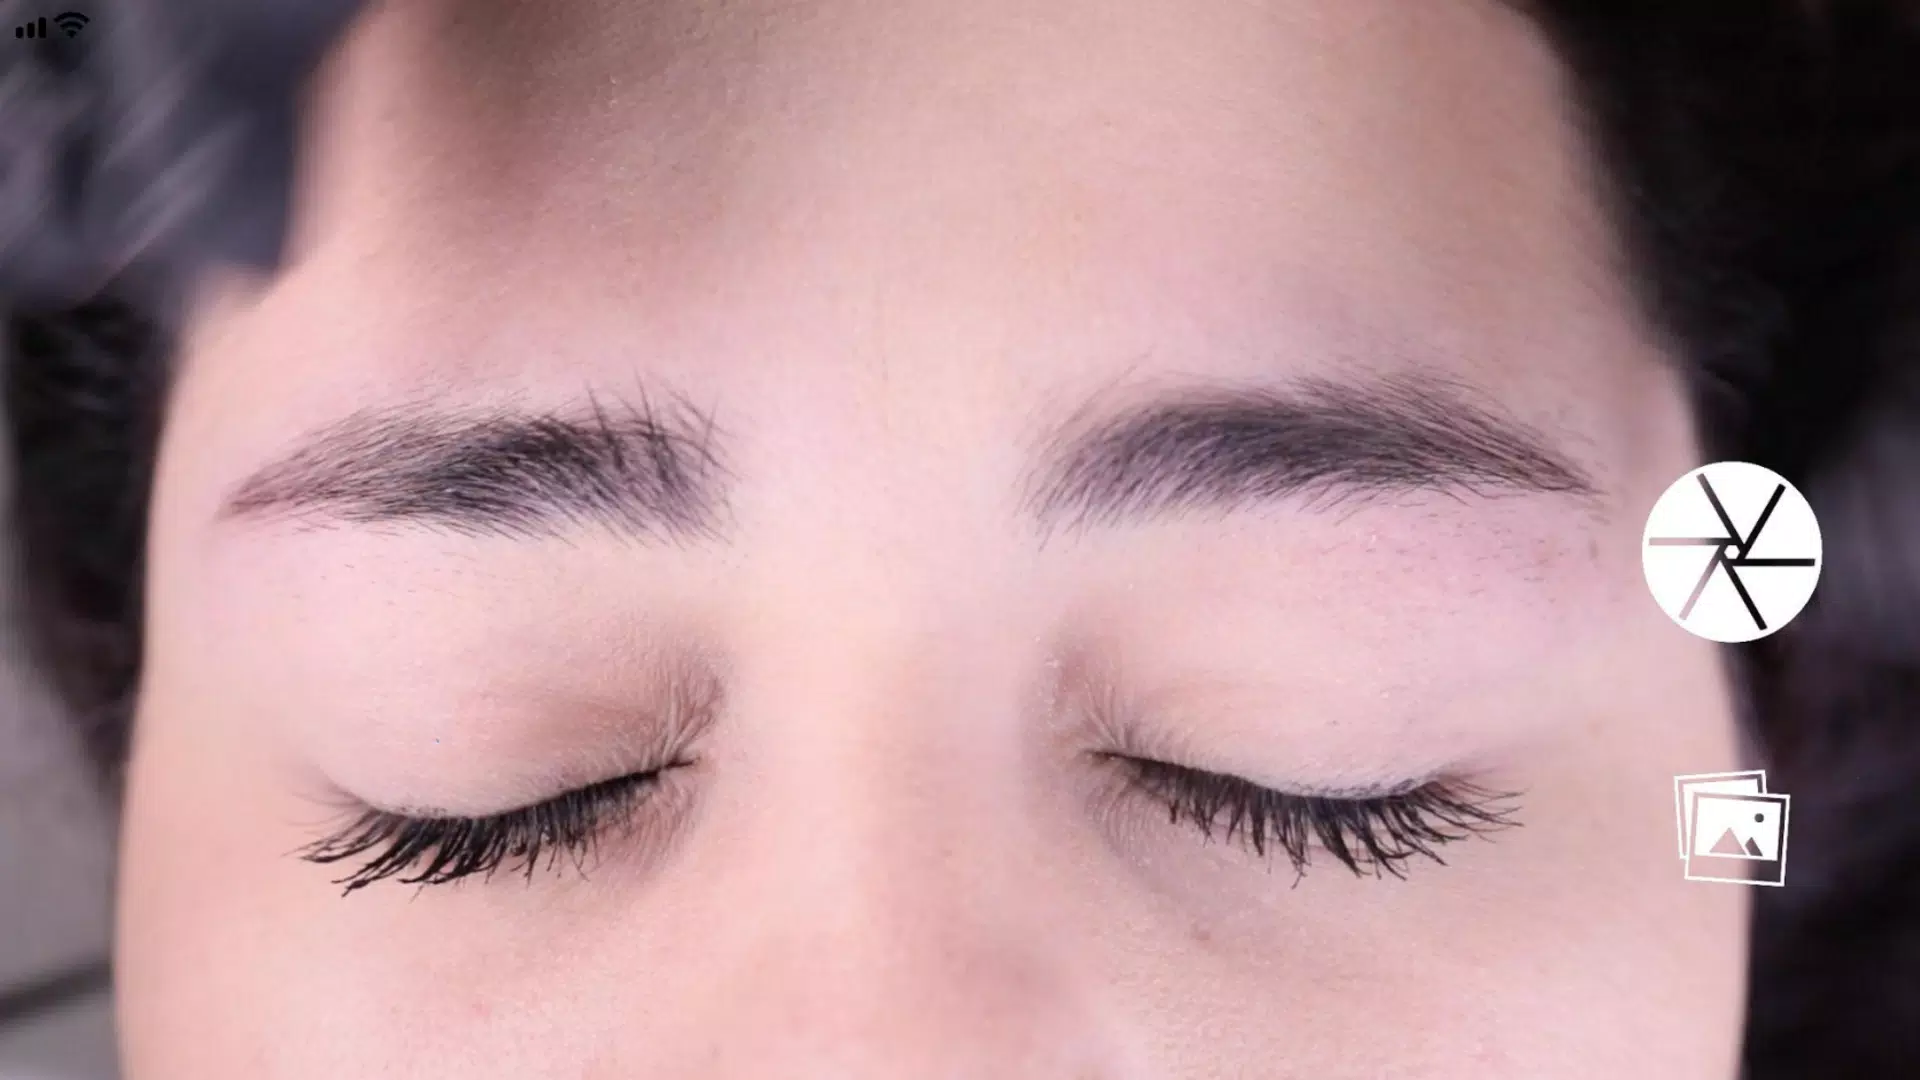
Step 2: Frame the Client’s Face
- Hold your device horizontally.
- Position the face so that:
- The top horizontal lines align with the arches of both eyebrows (point 2).
- The central vertical line is perfectly aligned with the center of the nose bridge, as previously marked during the consultation.
✅ Pro Tip: Ensure the client is facing forward and the face is level to avoid distortion.
Step 3: Capture the Image
- Once properly framed, press the center circular button on the right side of the screen to take the photo.
- The image will automatically appear on the screen for adjustment.
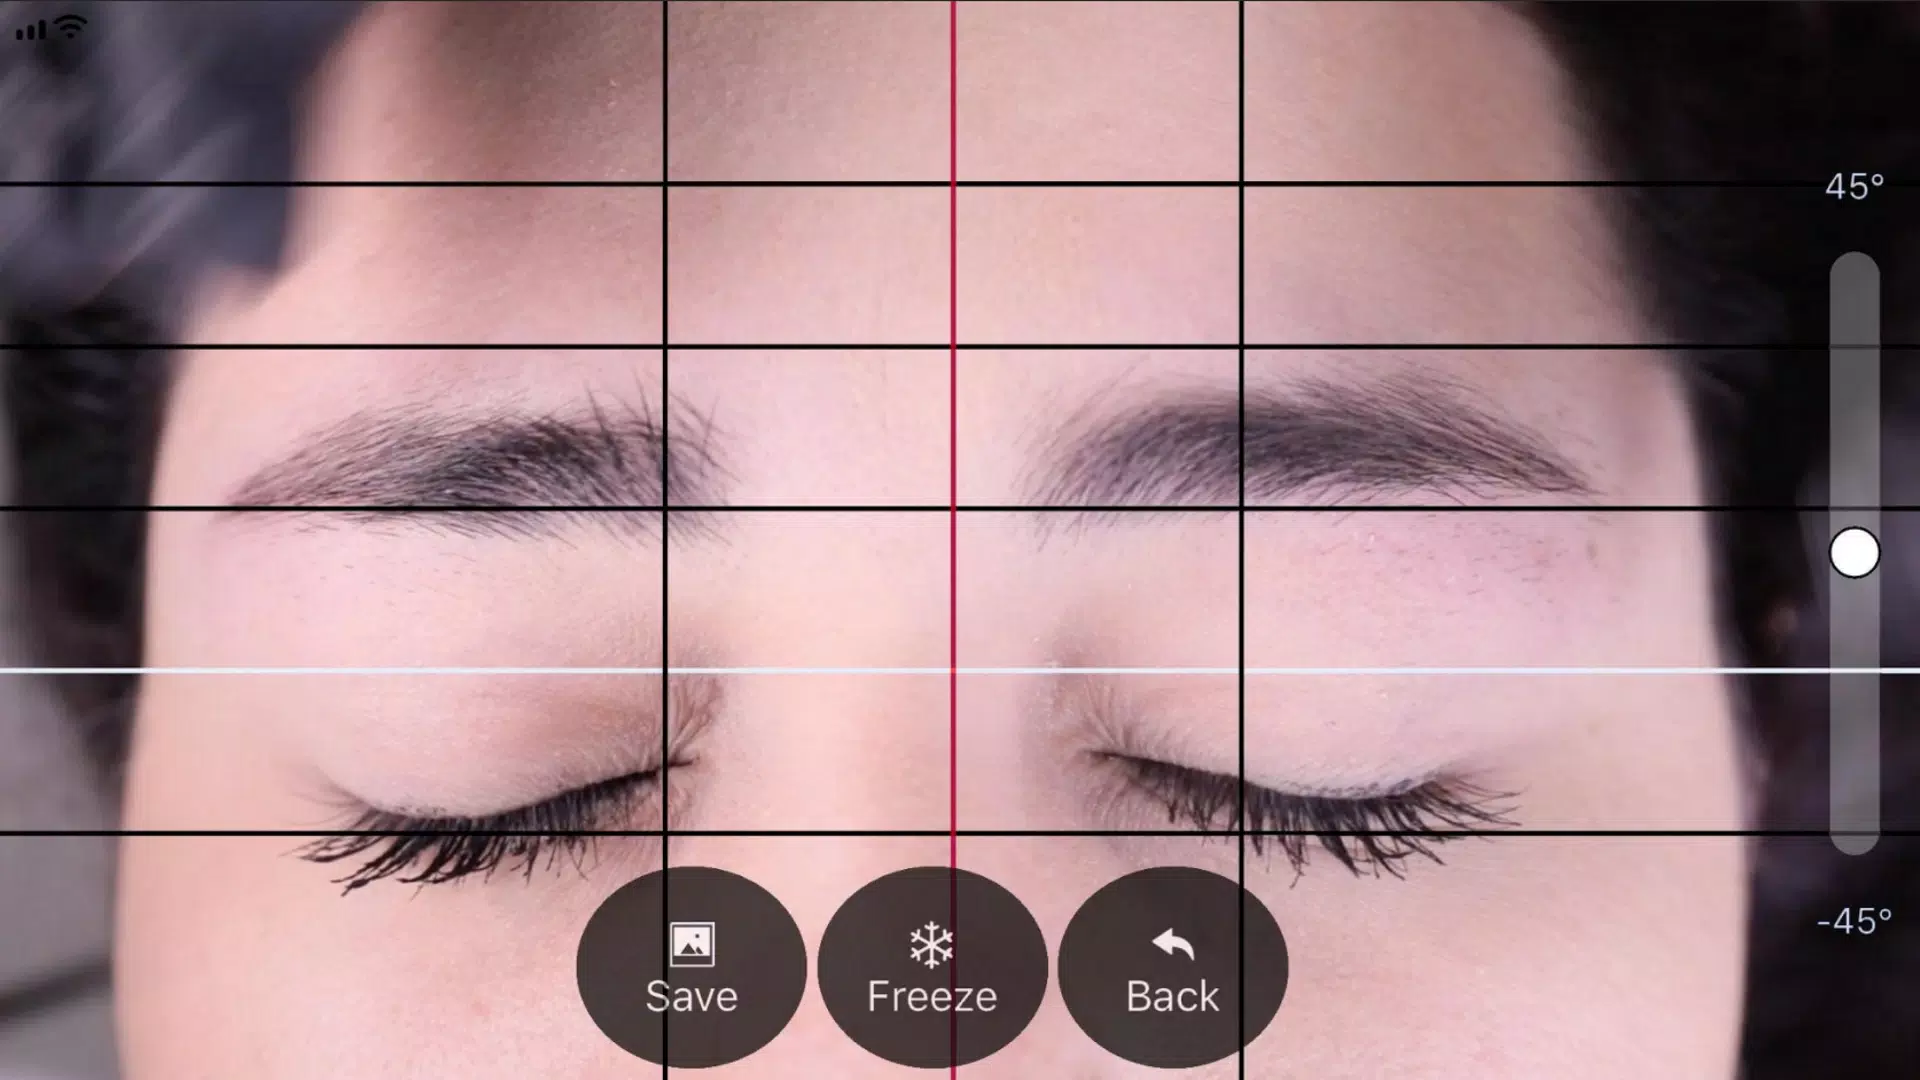
Step 4: Activate & Adjust the Grid (Horizontal Lines)
- Tap the “Grid” button (located in the top-right corner) to enable the overlay.
- You’ll now see:
- Four black horizontal lines (for eyebrow symmetry reference).
- One white horizontal line (for baseline alignment).
- Use your fingers to drag and adjust each line to match the natural shape and positioning of the eyebrows.
- Tap “Lock” to secure the Grid in place.
Step 5: Adjust Vertical Alignment (Center & Starting Points)
- The red vertical line is your primary guide — keep it centered on the nose bridge mark.
- Two outer black vertical lines will automatically adjust based on the red line’s position.
- Use these black lines to define the starting points of both eyebrows for perfect symmetry.
- Drag the red line carefully to ensure both sides are balanced.
Step 6: Fine-Tune Level & Zoom
- Level the Image:
- Slide the vertical adjustment control (on the right side) up or down to rotate the view and level the face.
- Zoom In:
- Use a two-finger pinch gesture to zoom in for more detailed alignment.
📌 Tip: Zooming allows you to see subtle asymmetries and make micro-adjustments.
Step 7: Save or Retry
- Once all lines are perfectly aligned:
- Tap “SAVE” to store the image in your device’s photo gallery.
- The image will include the symmetry grid for future reference during your treatment.
- To start over:
- Tap “BACK” to delete the current image and retake the photo.
💡 Why Artists Love This App:
- ✅ Real-time symmetry visualization
- ✅ Built-in alignment guides for precise brow mapping
- ✅ Simple, intuitive interface for fast workflow
- ✅ Saves time and boosts client confidence with measurable results
📱 Pro Tips for Best Results:
- Use the app before any pigment is applied.
- Light and consistent lighting improves accuracy.
- Always double-check the nose bridge mark and client’s natural brow shape.
BeautyPro Symmetry App International – Where Precision Meets Artistry.
Perfect brows begin with perfect symmetry.
Let me know if you’d like a printable PDF version, a video script, or a social media carousel to promote this app!