Here's a refined, professional, and user-friendly version of your original content—perfect for use in an app manual, tutorial video script, or client-facing guide:
BeautyPro Symmetry App International – Step-by-Step Guide
The Ultimate Tool for Precision in Microblading & Micropigmentation
Designed with precision in mind, the BeautyPro Symmetry App International helps microblading and micropigmentation artists achieve flawless facial symmetry with ease. Follow these simple 7 steps to get perfectly aligned eyebrow designs every time.
Step 1: Launch the App
Tap the BeautyPro Symmetry App International icon on your device’s home screen to open the application.
Step 2: Frame the Client’s Face
Hold your device horizontally and position it so the face is centered within the viewfinder.
- Align the top horizontal lines with the arches of both eyebrows (point 2).
- Place the central vertical line directly on the pre-marked center of the nose bridge.
This ensures accurate anatomical alignment for symmetry.
Step 3: Capture the Image
Once properly framed, press the center circular shutter button on the right side of the screen to take the photo.
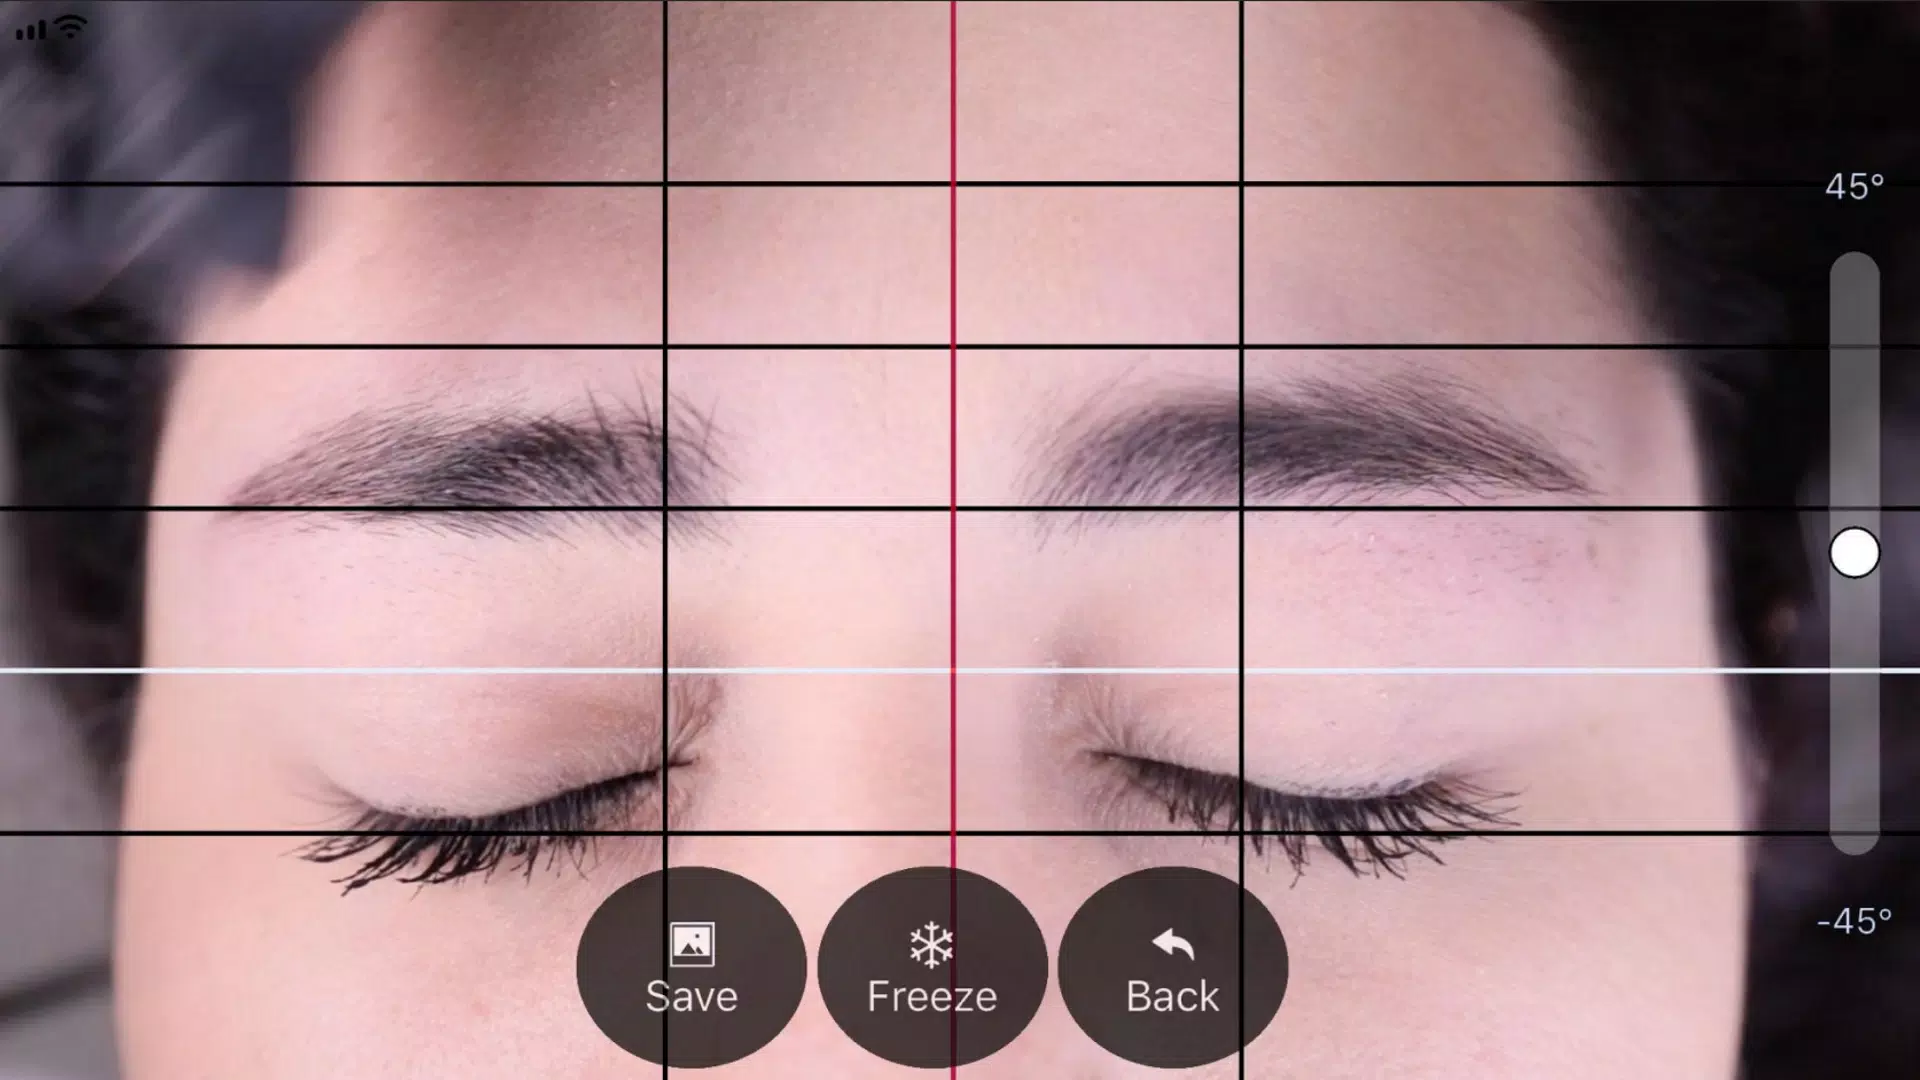
Step 4: Activate the Grid Function
After capturing the image, the screen will display a grid overlay consisting of:
- Four black horizontal lines (for eyebrow arch and placement reference)
- One white horizontal line (for the eyebrow’s natural endpoint)
Tap the “Grid” button to activate and lock the grid lines into place.
Step 5: Adjust the Vertical Lines
Fine-tune the vertical alignment using the grid’s lines:
- The central red line must remain precisely on the nose bridge center.
- The two outer black lines should be adjusted to match the starting points of the eyebrows (tail end of the natural arch).
Use these lines as visual guides to ensure both brows are symmetrical in length and placement.
Step 6: Level & Zoom for Perfection
Adjust the image for optimal accuracy:
- Level the photo: Slide the vertical adjustment control (on the far right) up or down to rotate and straighten the image.
- Zoom in: Use a two-finger pinch gesture to zoom closer for detailed alignment.
This ensures every measurement is precise, even in close-up shots.
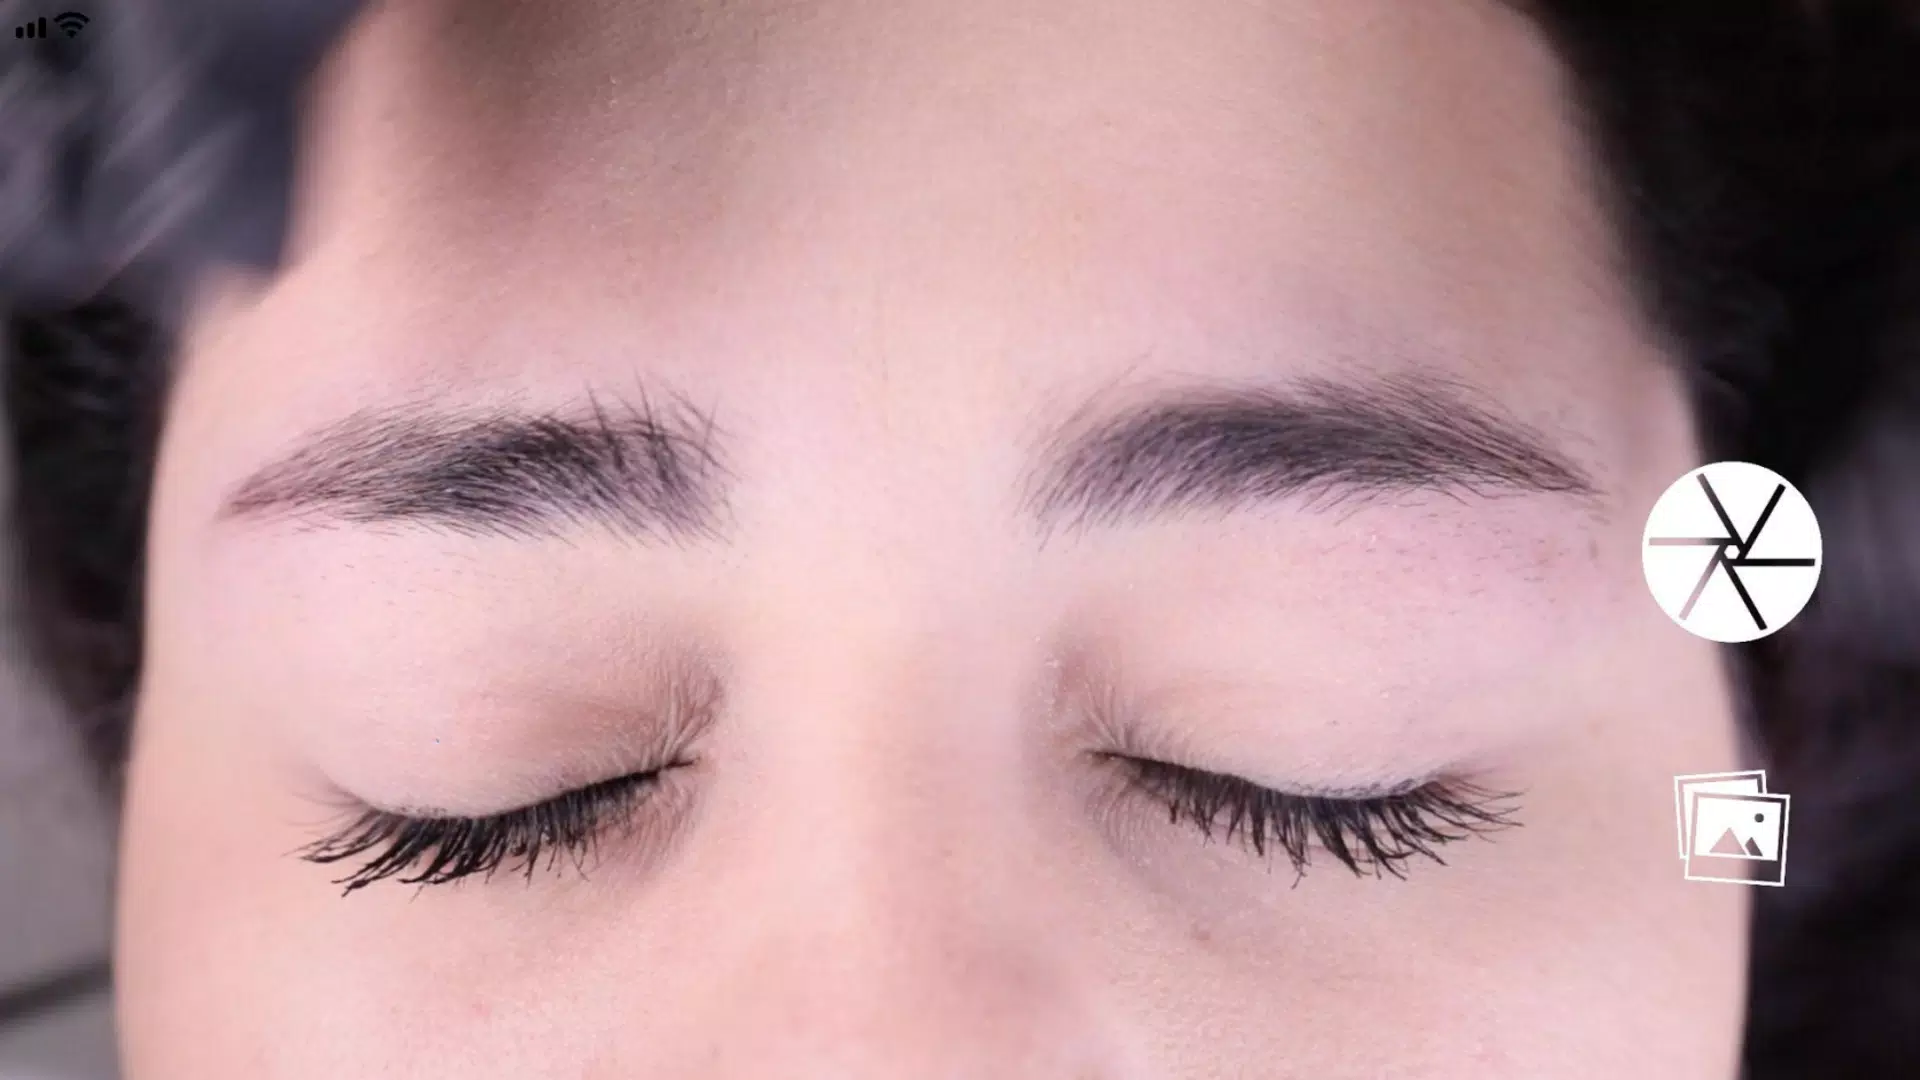
Step 7: Save or Re-Adjust
When satisfied with the alignment:
- Tap “SAVE” to store the image to your device’s photo gallery.
- Or tap “BACK” to delete and retake the photo.
Pro Tip: Save the image for reference during the procedure to maintain consistency and accuracy.
✅ Why Artists Love It:
- Simple, intuitive interface
- Built for real-world studio use
- Enhances consistency and client satisfaction
- Ideal for both training and professional practice
💡 Note: For best results, ensure good lighting, steady hands, and accurate pre-marking of the nose bridge center.
BeautyPro Symmetry App International – Because perfection begins with symmetry.
Let me know if you'd like this formatted as a PDF, printed guide, or embedded into an app help section!